Quick and simple tiger butter fudge is made with only 3 ingredients! Made using the microwave oven this is one of the easiest fudge recipes you will ever make. It looks pretty, tastes delicious, and is creamy smooth too!
Jump to:
Why You'll Love This Recipe
- Tiger butter fudge is an easy homemade candy that takes just minutes to make.
- You don’t need a candy thermometer or special tools to make this swirl fudge.
- This 3 ingredient fudge is creamy smooth with a delicious peanut butter flavour.
- Make this white chocolate peanut butter fudge as gifts for special occasions like Christmas, bridal showers, baby showers, Mother’s Day or Father’s Day. See our section “Homemade Fudge Packaging” for ideas.
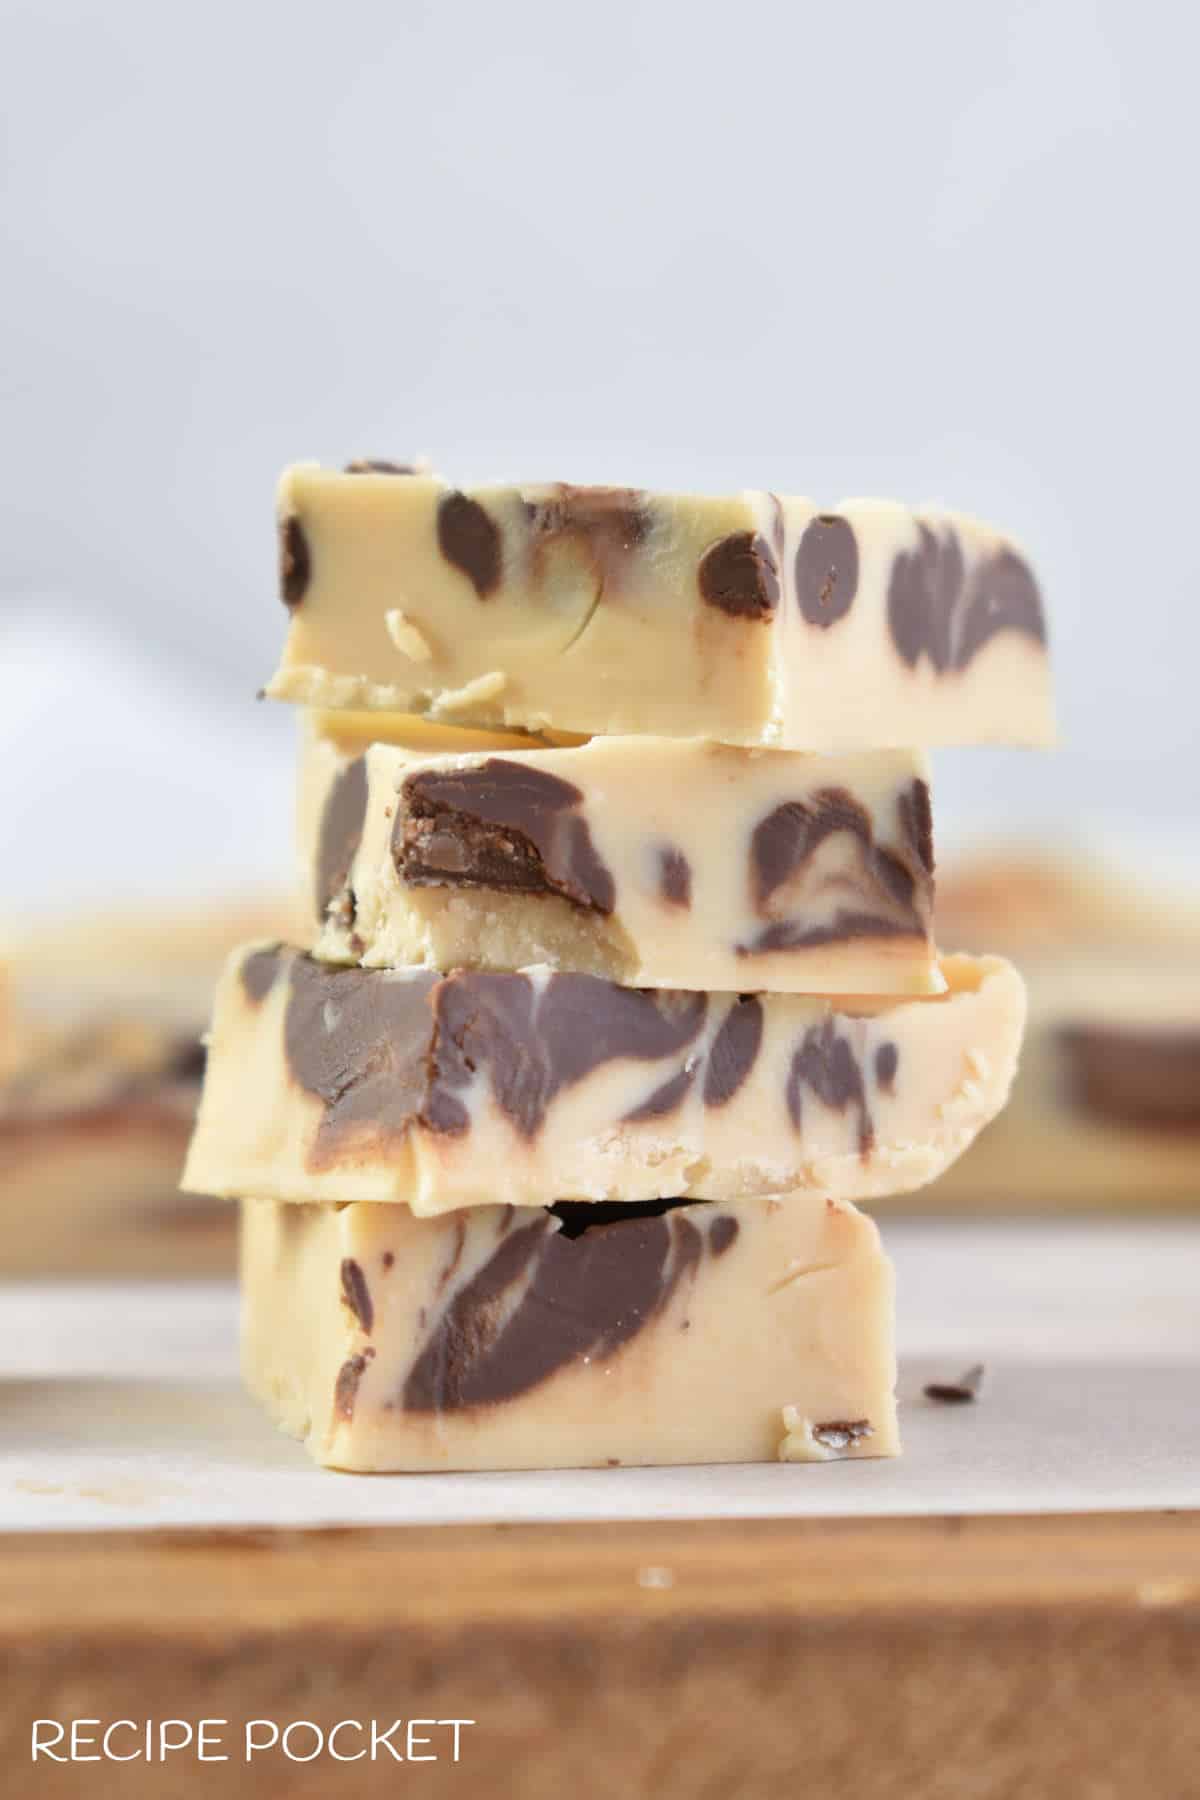
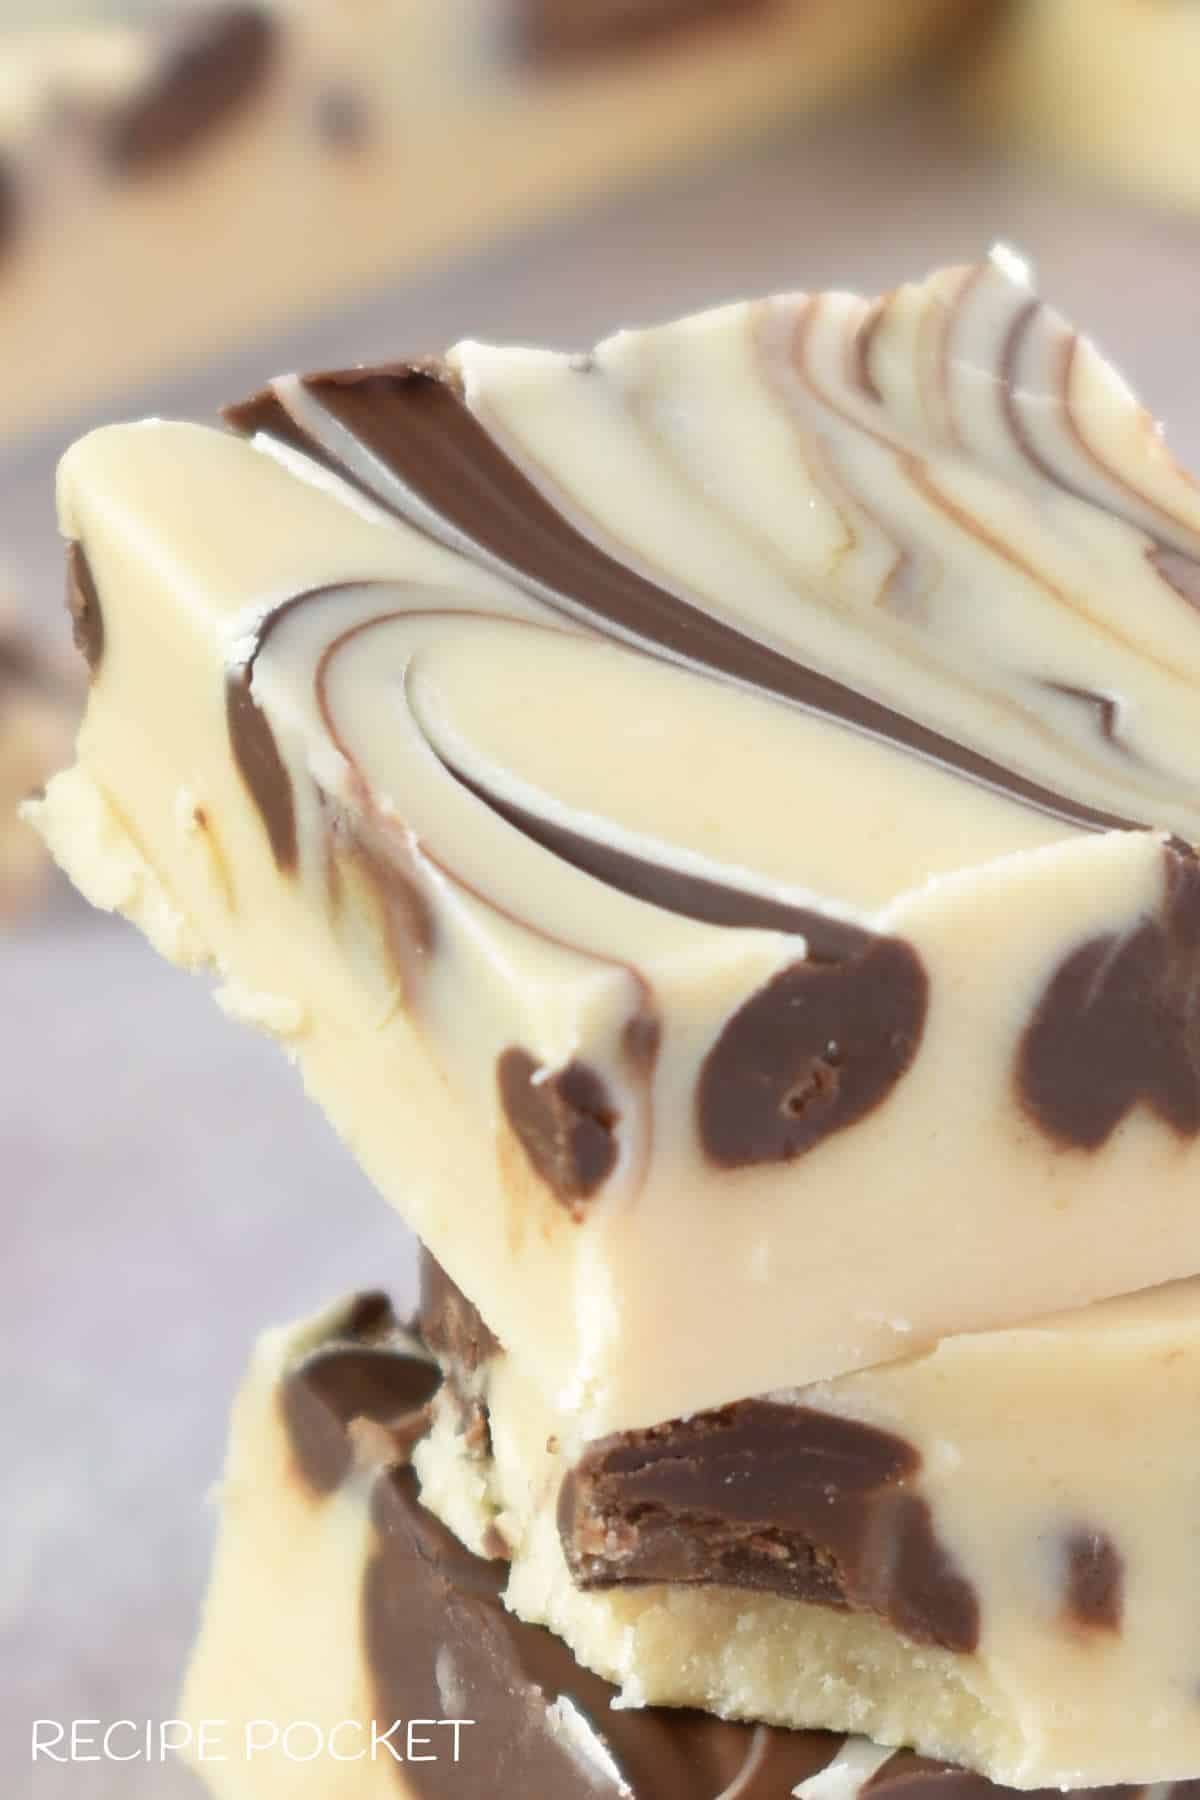
What Is Tiger Butter Fudge?
All it is is white chocolate and smooth creamy peanut butter mixed together to form a fudge base. While still soft the base is decorated with lines of dark chocolate, the two are then swirled together to form tiger-like stripes.
It’s not as thick as traditional fudge which is about 2.5 cm (1 inch) thick. It’s more like the thickness of chocolate bark at about 1 cm (0.4 inches) thick.
Tiger butter fudge can be cut into small 2.5 cm (1 inch) squares for pop in your mouth chocolate morsels or bigger squares or rectangles if you are feeling indulgent.
Ingredients

Chocolate – I used 1 bag (290 grams / 10 oz) white chocolate melts and 80 grams / 3 oz dark chocolate bits.
The white is sweet chocolate so there is no need to add sugar to this recipe.
Use dark chocolate instead of milk chocolate because it will stand out when swirled together with the peanut butter white chocolate fudge mixture.
Peanut butter – I used about half a cup of creamy peanut butter.
Don’t use natural peanut butter with an oil layer on the top, which needs to be stored in the fridge. These are usually not that smooth, and the oil will affect the finished fudge.
Rather get a smooth creamy peanut butter without an oil layer that does not require refrigeration.
Step By Step Instructions
Before starting the tiger butter fudge recipe, line the inside base and sides of a square 20 x 20 cm (8 x 8 inch) tin with parchment paper (baking paper).
To line the tin:
- Turn the tin upside down.
- Place a large piece of baking paper on to the upturned tin.
- Then smooth the paper over the tin creating sharp crease lines along the base and the corners of the tin.
- Remove the paper from the tin. Turn the tin right side up and slip in the shaped baking paper, smoothing it into place.

- Tip: If you find the sides of the paper falling to the inside of the tin. Place dots of melted chocolate (or soft butter) onto the sides of the tin slightly lower than the top of the paper. Next press the paper into the melted chocolate so that it holds on to the sides of the tin.

Step 1 – Place the white chocolate into a microwave-safe bowl. Microwave on high in 30-second bursts, stirring between each until everything is melted.
- Note: Don’t have a microwave. See our frequently asked questions section for how to melt chocolate on the stovetop.

Step 2 – Add the peanut butter and mix until smooth.

Step 3 – Pour the white chocolate peanut butter fudge mixture into a prepared pan lined with baking paper and evenly distribute the mixture.

Step 4 – Place the dark chocolate into another microwave-safe bowl and melt the chocolate chips and stir smooth.

Step 5 – Spoon or pour the dark chocolate in three lines over the chocolate peanut butter mixture.

Step 6 – Use a knife or skewer to drag through the dark chocolate to create swirls on the top of the white chocolate peanut butter fudge.

Step 7 - Allow the tiger butter fudge to sit for 4-5 hours (or more) at room temperature to set. If it’s a very hot day, allow the fudge to come to room temperature and place it in the fridge until set. Use a long sharp heavy smooth edge knife to cut the fudge.
Recipe Notes
Microwave Containers
When melting chocolate in the microwave the containers do get very hot so, use caution when removing the melted chocolate from the microwave oven.
If you have a microwave oven-safe jug with a handle, use that when melting the white chocolate and you can use a microwave-safe mug for the dark chocolate.
Using a container with a handle is convenient for pouring the mixture into the prepared pan.
If you don’t have suitable containers with handles for the microwave oven, use a folded tea towel when removing the heated chocolate from the microwave.
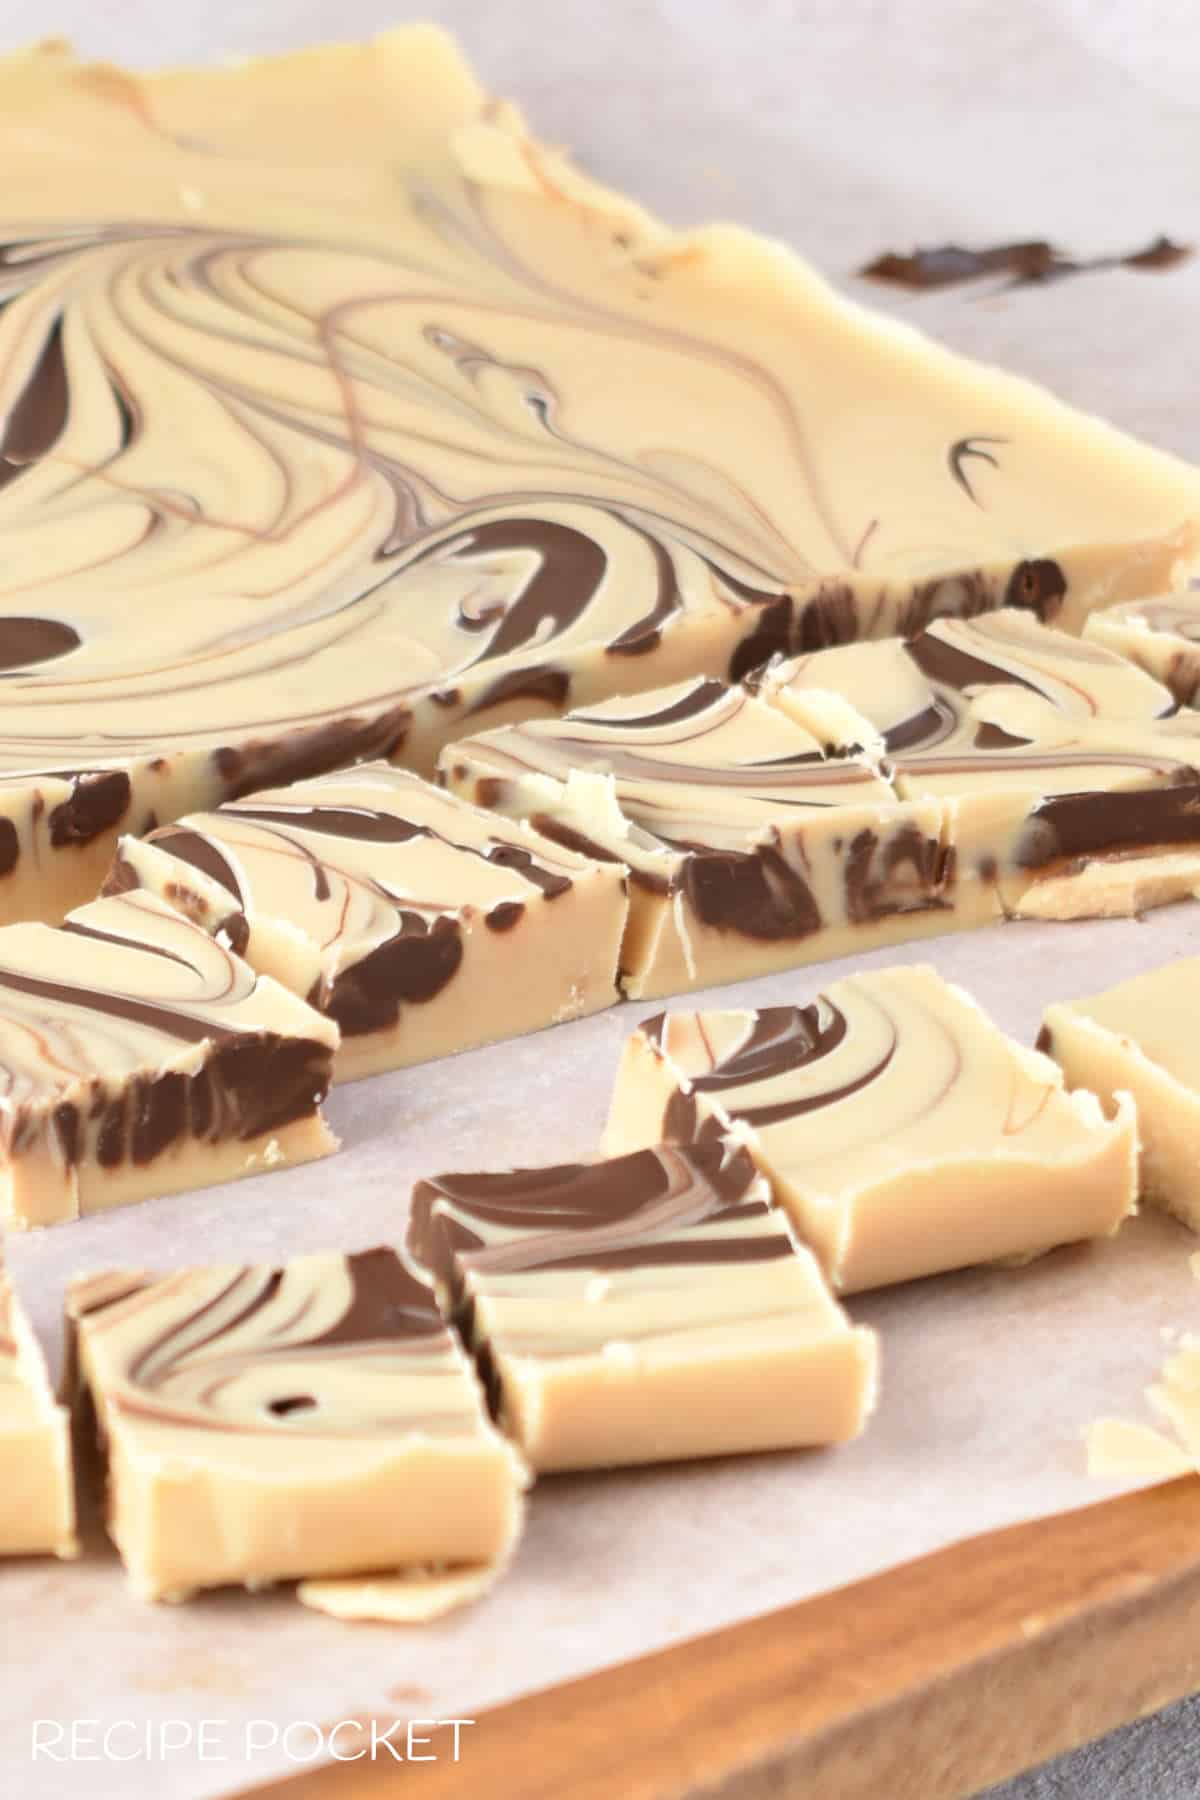
How To Cut Fudge?
- Allow the fudge to set preferably overnight.
- Remove the fudge from the tin and place onto a large chopping board. If the fudge has been set in the fridge allow it to come to room temperature before cutting.
- To get even sized piece use a ruler to measure and mark your desired fudge size before cutting.
- Use a long sharp heavy smooth edge knife to cut the fudge. Don’t use a serrated knife because it won’t give nice clean cuts.
- Cut the fudge in long strips and then into smaller pieces.
- If you have difficulty cutting the fudge, try warming the knife in hot water between cuts, wiping the blade dry every time before cutting.
How Big To Cut Fudge?
When cutting fudge think about what you are going to do with it, is it for your family or giving out as gifts.
For us, we like sweets things but not too much of it. So, I will cut it into small tiny squares that we can pop into our mouths and savor. If for sharing with others it will be cut into larger pieces.
If the tiger peanut butter candy is for gift-giving, it will be cut depending on how it is going to be presented (see our section below on “Homemade Fudge Packaging” for ideas).
Fudge can be cut into any of the following sizes:
- The fudge can be cut into four long 5 x 20 cm (2 x 8 inch) bars.
- It can be cut into four large 10 x 10 cm (4 x 4 inch) squares.
- Cut it into eight 5 x 10 cm (2 x 4 inch) rectangles.
- Cut it into sixteen 5 x 5 cm (2 x 2 inch) squares.
- It can also be cut into tiny 2 ½ – 3 cm (1 inch) squares.
Note: the above cutting sizes are based on fudge made in a 20 x 20 cm (8 x 8 inch) tin.
How To Make a Thicker Tiger Butter Candy?
As mentioned early in the article this tiger butter fudge is thin at about 1 cm (0.4 inches) thick, making it more like a tiger butter bark.
If you wanted a thickness similar to traditional fudge at about 2.5 cm (1 inch), you can do one of the following:
Option 1 - Use the quantities of white chocolate and peanut butter as stated in the recipe. Then pour the fudge into a smaller container such as a 10 x 20 cm (4 x 8 inch) rectangular dish.
You will only need about half of the dark chocolate because, you don’t need as much to make the swirls on top, due to the smaller surface area.
The servings will be less, but the tiger fudge will be thicker.
Option 2 - Double the white chocolate and peanut butter in the recipe and use a 20 x 20 cm (8 x 8 inch) tin to set the fudge in.
There is no need to double the dark chocolate because what's in the recipe is enough to make the chocolate swirl on top.
You will get the same number of bars from the fudge as stated in the recipe only it will be thicker.
Homemade Fudge Packaging Ideas
1. Cellophane
Fudge wrapped in clear cellophane (clear wrapping paper) or clear bags is an inexpensive way to package fudge, although it’s really environmentally friendly.
Larger pieces of fudge look nice when wrapped like this and tied with a ribbon. The tiger fudge can be packaged several days in advance.
2. Wax paper
Fudge can be wrapped in wax paper which is environmentally friendly. This is best done the night before to keep the wax paper wrapping looking at its best.
A nice way to present fudge wrapped this way is to individually wrap 3 medium pieces of fudge, then stack them on top of one another, tying the bundle together with decorative string or thin ribbon.
3. Recycle Small Jars or Containers
Small jars or containers with lids are great for placing smaller squares of fudge in. These are usually airtight which will help to keep the fudge fresh.
Make sure that they are cleaned properly with labels and glue removed.
Use jars that don’t have a lingering smell because these smells can transfer to the fudge and spoil the taste of it.
Strong smells are often trapped in the rubber seal of the lid. If you like the look of a jar and the lid smells, swap the lid with another suitable fitting lid that does not smell.
Make the jars pretty with a circle of decorative fabric to cover the lid and secure it in place with a ribbon bow.
FAQ
Homemade tiger butter fudge is best stored covered in an airtight container in the fridge and will keep for up to one month in the fridge.
It can also be stored in an airtight container at room temperature for one week.
Yes, tiger butter fudge can be frozen. To freeze wrap tightly in plastic food wrap and place into a freezer-safe bag or container.
When properly stored homemade fudge can be kept in the fridge for up to one month. For longer storage, it can be frozen for about 3-4 months.
To melt chocolate on the stovetop you will need to use the double boiler method to do this:
1. Place the chocolate into a medium-size heat-proof bowl.
2. Then fill a small size saucepan with about 5 cm (2 inches) of water, bring this to a boil, then turn the heat down low. The water should barely simmer.
3. Place the bowl with the chocolate over the saucepan and allow the chocolate the melt. Stirring it occasionally as it melts.
4. The chocolate is melted when it is smooth and pours easily of a spoon.
Note:
• The bottom of the bowl should not touch the water.
• Don’t let any water drip into the bowl with the chocolate. If it does the chocolate will seize and become hard and lumpy.
More Sweet Recipes
If you like this chocolate recipe you might like to try this white chocolate sauce recipe or, this white chocolate rocky road recipe, or this Halloween rocky road, or these easy chocolate truffles made with cake crumbs, or this recipe for chocolate brownies with a cake mix or these other easy sweet recipes:
There you have it. So easy isn't it!
I would love it told me if you are going to make this simple treat for yourself or as a gift? Let me know in the comments below.
Recipe

3 Ingredient Tiger Butter Fudge
Ingredients
- 290 grams (10 oz) white chocolate
- 120 grams (½ cup) smooth peanut butter
- 80 grams (3 oz) dark chocolate
Instructions
- Prepare the tinBefore starting the tiger butter fudge recipe, line the inside base and sides of a square 20 x 20 cm (8 x 8 inch) tin with parchment paper (baking paper).Make the fudgePlace the white chocolate in a microwave safe bowl. Microwave on high in 30 second bursts, stirring between each until everything is melted.Don’t have a microwave. See notes for how to melt chocolate on the stove top.
- Add the peanut butter and mix until smooth.
- Pour the white chocolate peanut butter fudge mixture into a prepared pan lined with baking paper and evenly distribute the mixture.
- Place the dark chocolate into another microwave safe bowl and melt the chocolate chips and stir smooth.
- Spoon or pour the dark chocolate in three lines over the chocolate peanut butter mixture.
- Use a knife or skewer to drag through the dark chocolate to create swirls on the top of the white chocolate peanut butter fudge.
- Allow the tiger butter fudge to sit for 4-5 hours (or more) at room temperature to set. If it’s a very hot day, allow the fudge to come to room temperature and place in the fridge until set. Use a long sharp heavy smooth edge knife to cut the fudge.
Notes
• The bottom of the bowl should not touch the water. • Don’t let any water drip into the bowl with the chocolate. If it does the chocolate will seize and become hard and lumpy. **** HOW TO CUT FUDGE? 1. Allow the fudge to set preferably overnight. 2. Remove the fudge from the tin and place onto a large chopping board. If the fudge has been set in the fridge allow it to come to room temperature before cutting. 3. To get even sized piece use a ruler to measure and mark your desired fudge size before cutting. 4. Use a long sharp heavy smooth edge knife to cut the fudge. Don’t use a serrated knife because it won’t give nice clean cuts. 5. Cut the fudge in long strips and then into smaller pieces. 6. If you have difficulty cutting the fudge, try warming the knife in hot water between cuts, wiping the blade dry every time before cutting. **** HOW BIG TO CUT FUDGE? When cutting fudge think about what you are going to do with it, is it for your family or giving out as gifts. Fudge can be cut into any of the following sizes:
- The fudge can be cut into four long 5 x 20 cm (2 x 8 inch) bars.
- It can be cut into four large 10 x 10 cm (4 x 4 inch) squares.
- Cut it into eight 5 x 10 cm (2 x 4 inch) rectangles.
- Cut it into sixteen 5 x 5 cm (2 x 2 inch) squares.
- It can also be cut into tiny 2 ½ – 3 cm (1 inch) squares.


Sherrie Jurczenia says
I really appreciate you taking the time to explain all the differences in sizes of the fudge.