How to Make Paneer at home – an easy step by step recipe. Making paneer at home is easy, and much cheaper than anything you would buy. It’s preservative free and made with natural ingredients. Plus, homemade paneer is fresh, soft, creamy and smooth in texture.
Jump to:
Why You'll Love This Recipe
It is:
- an easy paneer recipe and quick to make,
- a very simple cheese recipe perfect for beginners,
- cheap to make,
- can be used to make sweet and savoury dishes and is
- vegetarian.

If this is your the first-time making paneer or if you have tried, but failed to make it successfully, then keep reading.
What Is Paneer?
Paneer is a soft Indian cheese that has traditionally been made with buffalo milk, although now, it is commonly made with cow’s milk. Paneer cheese is not readily available everywhere, and in some cases can be expensive to buy.
In my area a 200-gram block of paneer costs around $6.90 which equals to $34.50 a kilo. That’s way too expensive, for something that’s made just from cow's milk and a little cream. Working with today’s prices, I can make paneer for around $7.60 a kilo. (Prices current with the date of this post).
Did you know? That making paneer is very similar to making ricotta. The process is almost identical. The only difference is that paneer is pressed into shape and ricotta is not.
Paneer Cheese Substitute
There really is no substitute for paneer. You could probably use hard tofu, but you won’t get the same mild, milky flavor that paneer has. Just like paneer, tofu can be added to both sweet and savory dishes. But, why look for a substitute (unless it is dietary related), it’s so easy to make.
Tips For Making Paneer At Home
Making Paneer At Home - Step 1
Making The Curds
- I like to use a combination of full cream pasteurised cow’s milk and cream – the cream is optional. However, by adding cream to the milk, you’ll end up with a soft and creamy textured paneer cheese.
- It’s important to bring the milk to the boil, then allow the milk to simmer on low heat for at least 5 minutes. This boiling process will help the milk curdle when vinegar or lemon juice is added.
- I also like to add 1 ½ teaspoons of salt to the milk. This can be added to the milk before or after boiling. Traditionally, paneer is made without salt, but I like to add it, because it gives the cheese more flavour.
- Before adding vinegar or lemon juice, the milk needs to be cooled slightly. This can be done by adding a cup full of iced water. If the milk is too hot when the vinegar is added, the curds will become firm in texture.
- Next, slowly stir the milk as you slowly pour the vinegar in. The milk will start to curdle and separate into curds and whey, this will take a few minutes.
- Once the curds and whey have formed, add another 2-3 cups of iced water this will cool the mixture even more.
- The next step is to drain the curds and whey.
Making Paneer At Home - Step 2
Draining the Curds

- You will need to line a large strainer with a muslin cloth. You can either place the strainer into a large deep bowl to catch the whey if you want to keep it, or place the strainer into a clean sink and allow the whey to drain away.
- After adding the curdled milk to the strainer, it will still be hot. Cool it down by rinsing it with more iced water. The water will also wash away any vinegar or lemon juice flavour that may be present in the cheese.
- Allow most of the water to drain away. A quick and fast way to drain away, is by gathering the ends of the muslin cloth around the whey and lift it out of the strainer. This will allow the liquid to drain more freely than it would if it stayed in the strainer. To help the draining process you can also gently press and squeeze out the liquid.
- How much liquid you drain out at this stage will play a part in how soft or firm the cheese will be after pressing.

Note: After your first few attempts of making paneer at home, you will get a feel of how much water needs to be removed, to give you a cheese consistency you like.
Making Paneer At Home - Step 3
Shaping and Compressing The Paneer
You’ll want to leave the curd tightly wrapped in the muslin cloth with a weight added to the top. Allow it to stand for about 2 hours, the pressure from the weight will force out more liquid and compress the cheese into a firm block.
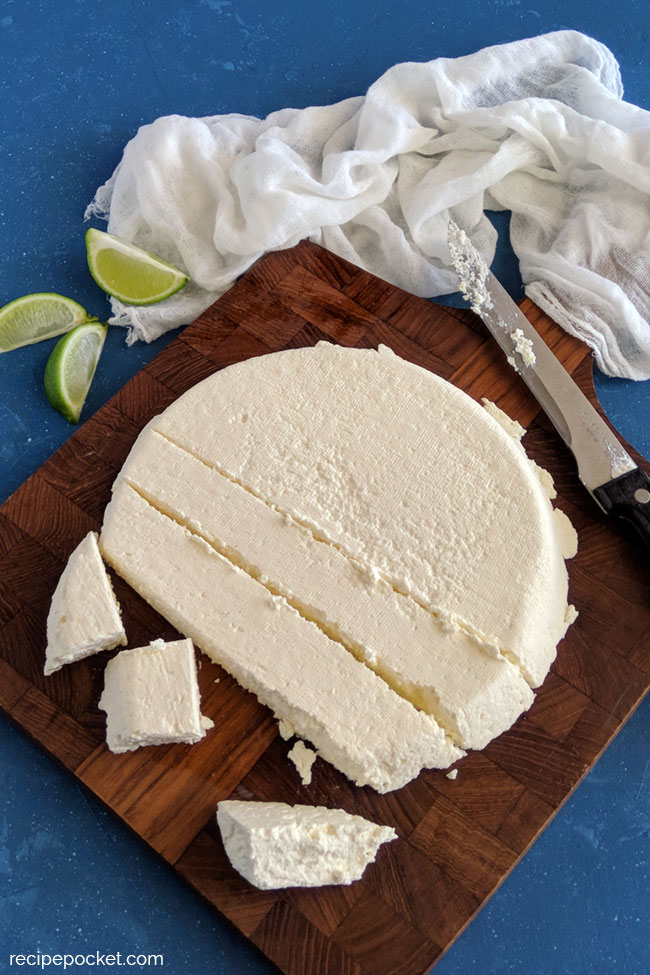
Shaping the Cheese
The cheese can be shaped into a rectangular or square block.

- To do this, I like to place the cheese on a flat perforated surface. For example, use a wire cake rack or use an upturned pizza baking tray with holes in it. These can be placed directly onto the side of your sink or sit over a tray or large bowl, see picture examples lower down the page.
- Place the muslin cloth on top of the tray and open it up. Use a spatula or your clean hands to shape the curds into a square or rectangle.
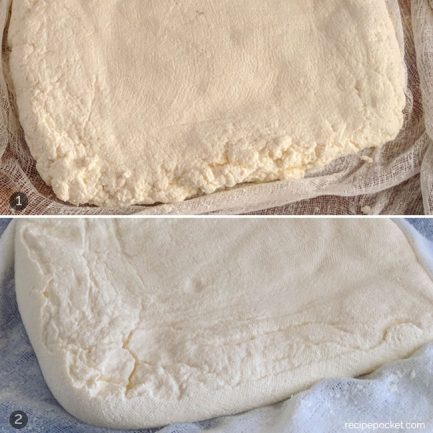
- Tightly and neatly fold back the muslin cloth over the curds, while still keeping the shape. If you don’t wrap it tightly, the edges could end up crumbly as shown below in image 1. In image 2, the paneer was tightly wrapped in the muslin.

Making Paneer At Home - Step 4
Adding Weight
- A weight needs to be placed on top of the cheese. I like to sit a flat tray or a cutting board on top of the cheese, then balance the weight on top.
- You can use anything as a weight, it could be; canned food, exercise weights, a saucepan or bottle filled with water or, any heavy object that you can find.
- For compressing and extracting excess water from the cheese a 2 kg weight is ideal. If you use a weight that is to light, the cheese will not compress enough and will be soft and wet. If it’s too heavy you will end up with a drier, firmer cheese that could end up being crumbly.


How To Store Homemade Paneer
Once the cheese has been made, it can be transfer to a plate or container, sealed and stored in the fridge.
How Long Can You Keep Fresh Paneer?
Fresh paneer if stored correctly will stay fresh in the fridge for about 5 - 7 days.
Does Paneer Need To Be Cooked?
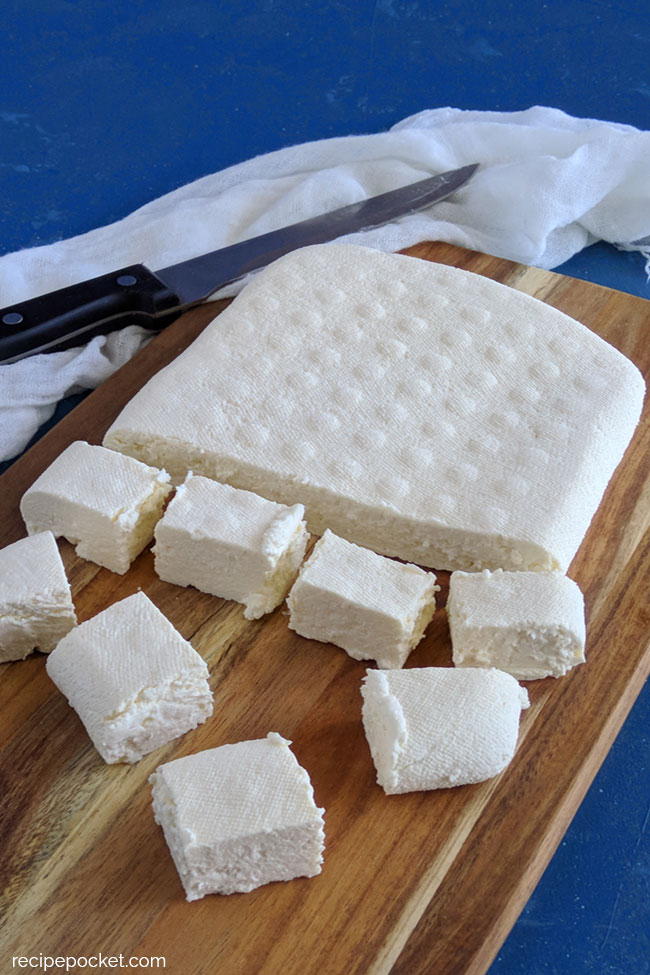
Paneer is a soft fresh cheese, that doesn’t need to be aged like other cheeses. Once it has been pressed into shape it can be eaten it just like that.
If you would like to eat it hot, simply cut the paneer into cubes and fry it. Paneer cubes can also be mixed with other ingredients to create simple dishes like: paneer tikka masala, shahi paneer, mutter paneer, spinach and paneer or paneer stuffed aubergine.
How To Fry Paneer Cubes
Heat a non-stick fry pan with 1-2 teaspoons of oil. Add the paneer cubes to the pan and fry for about 3-4 minutes over medium heat, until the bottom turns golden brown. Flip the cubes over and brown the other side. Remove from the heat, sprinkle with a little salt and eat hot.
More Easy Recipes

Recipe
Making Paneer At Home
Equipment
- Large deep saucepan
- Mixing spoon
- Large deep bowl for draining
- Large sieve
- Muslin cloth
- Cake rack
- Small chopping board or cake tin
- Weights - unopened canned food can be used
Ingredients
- 2 Lt (8 cups) full cream milk
- 250 ml (1 cup) cream optional, but by adding it you get a smoother creamier paneer
- 1 ½ teaspoons salt optional
- 250 ml ( cup) iced water
- 5 tablespoons white vinegar
Extra
- 2 - 3 Lt (8 - 12 cups) cold water with added ice cubes to keep it very cold
Instructions
- Place the milk, cream and salt into a deep, thick bottom saucepan. Bring to the boil over a high heat. Stirring the milk to avoid burning.
- When it has come to the rolling boil, turn the heat down to low and simmer for 5 minutes. Occasionally stir the milk while it simmers.
- Turn the heat off.
- Stir 1 cup of ice water into the hot milk – cooling the milk a little at this stage will help make the paneer soft.
- Gently stir in the white vinegar a little at a time. The milk will separate and form curds and whey.
- Once the curds have formed, stir in about 3 – 4 cups of iced water to the curds and whey. The reason for this isf the curd is left sitting for too long in the hot whey it will become firm. Therefore, it’s important to cool it almost immediately if you want a soft paneer.
Drain the Curds And Whey
- To drain the curds and whey you will need a large strainer or colander, lined with a large piece of muslin cloth. Place the prepared strainer into a large deep bowl if you wish to keep the whey. If you don’t want to keep the whey, place the prepared strainer into a clean sink.
- Pour the curds and whey into the muslin lined strainer and drain.
Wash the Paneer
- Pour iced water over the paneer (while it is still in the muslin lined strainer), use clean hands to mix the water through the grains. This will help wash away the vinegar flavour from the cheese.
- Gather the sides of the muslin cloth together and press and squeeze the water from the paneer.
Shaping and Compressing The Paneer
- To shape the paneer, I like to form it into a rectangular block, to do this:
- You will need to use a cake rack and place it over a bowl or on the side of your sink. This will allow excess water to drain way from the cheese.
- Place the paneer filled muslin cloth onto the cake rack. Unfold the muslin cloth and use your hands to shape the paneer into a rectangle that is about 3 cm thick.
- Tightly fold the muslin back over the top of the cheese, keeping the rectangular shape.
- Place a cutting board or baking tray on top of the paneer and add weights on top (you can use a pot filled with water, canned food or anything with a bit of weight). This will compress the cheese and press more liquid.
- Allow the cheese to sit like this for about 2-3 hours.
- Remove from the muslin.
- Transfer the paneer to a plate or container, seal and refrigerate and allow to chill before cutting and cooking.


Comments
No Comments