A simple and easy cheese breadsticks recipe. These savoury bread twists are made from scratch and have a buttery, garlic, and onion flavour.
Soft and homemade, these parmesan bread twists are great to eat straight from the oven or served as part of a meal. Trust me, they are so addictive you’ll find it hard to stop at just one.

Jump to:
How to Make Cheese Bread Twists
First make the bread dough, then roll the dough into a large rectangle, spread on melted butter, garlic and onion power, then sprinkle on the cheese. Fold the dough in half, cut into strips, twist and bake.

How to Make This Cheese Breadsticks Recipe
This is an easy recipe to make from scratch and can be a little messy in the making. At the end of twisting the breadsticks you will find cheese on the bench, just scrap it up and sprinkle it over the uncooked sticks before baking.
To Make the Cheese Twists
The dough is rolled out into a large rectangle, half of which is covered in the filling. It is then folded in half (with the filling in the middle) and then cut into nine 3cm wide strips (about the width of a ruler).
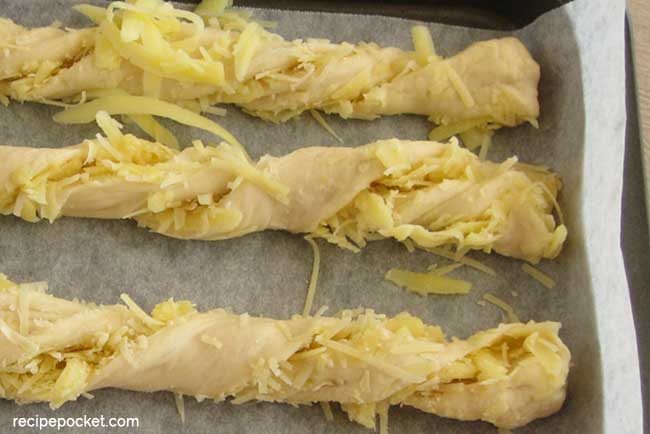
These dough pieces are twisted and gently pulled, so that it stretches and doubles in length, the dough is then cut in half before being placed onto baking trays.

These homemade cheese breadsticks look like a mess before going into the oven (pictured above) but come out looking nice and golden when baked (pictured below).

These taste so good straight from the oven and are best eaten the day they are made.

These parmesan garlic bread twists go well with my homemade roasted tomato soup pictured above.
Related Articles
If you are new to bread making you might like to read the following articles before making the bread: Like this article on How to use instant yeast or this article with Tips for kneading dough in a mixer or this article on Why is my bread dense and heavy?

More Easy Recipes
Recipe

Homemade Cheesy Breadsticks
Ingredients
For the dough
- 350 grams (12.34 ounces) bread flour
- 1½ teaspoons salt
- 200 ml (7.05 ounces) water
- 3 tablespoons olive oil
- 1½ teaspoons dried instant yeast
For the filling
- 150 grams (5.29 ounces) cheddar cheese grated (or a similar type of cheese)
- 60 grams (2.11 ounces) parmesan cheese grated
- 30 grams (1.05 ounces) butter melted
- 1 teaspoon garlic powder
- 1 teaspoon onion powder
Instructions
Yeast Note: Make sure that your yeast is fresh and active before you start the recipe.
- If you know that your yeast is fresh and active there is no need to do this step. However, if you have doubts to its freshness, proof the yeast to determine if it is active. Find instructions on how to proof yeast on our “How to use instant yeast” article. Then select one of the methods below for making the dough.
Making Dough In A Stand Mixer
- Place all the ingredients for the dough into the bowl of your stand mixer.
- Using the dough hook and a low speed, mix until the ingredients come together. Scrap down the sides of the bowl if necessary. Safety Note: Scrape down the bowl when the machine is turned off.
- Increase the mixer speed to medium and knead until the dough stops looking wet and lumpy and stops sticking to the sides of the bowl. It should be smooth and cling to the dough hook. This could take about 6 – 10 minutes depending on your machine.
- Transfer the dough to a large, lightly oiled bowl. Cover with plastic food wrap, place in a warm area and allow to double in size.
Making Dough In A Bread Machine
- Place all the ingredients into the basket of your bread machine, in the order outlined in the instruction manual.
- Set the machine to the dough cycle. After kneading, leave the dough in the basket and allow it to double in size.
Making Dough By Hand
- Place all the ingredients into a large mixing bowl, use your hands to form a dough.
- Tip the dough onto a lightly floured bench and knead for about 10 – 20 minutes, or until it becomes smooth and pliable.
- Transfer the dough to a large, lightly oiled bowl. Cover with plastic food wrap, place in a warm area and allow to double in size.
Line two baking trays with baking paper. Preheat oven to 200°C (390°F) - when you get to step 7.
Making and Shaping the Breadsticks
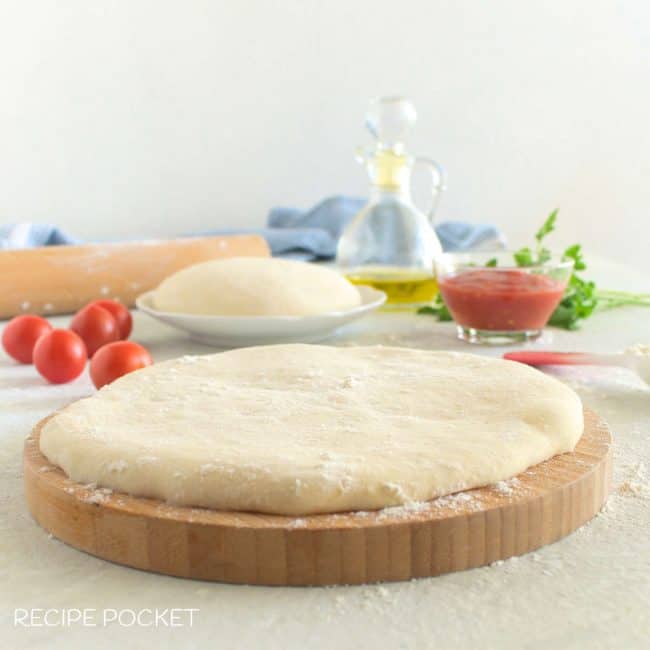
- After the dough has doubled in size, turn out onto a lightly floured surface and roll out into a large rectangle 27 x 46cm.
- Mix the garlic and onion powder into the melted butter, then brush over the top of the dough rectangle.
- On one half of the dough (the half that is closets to you) sprinkle over the cheeses and press down lightly.
- Next, fold the top half of the dough over the cheese, so that you get a rectangle that is about 27 x 23 cm, with the cheese sandwiched in the middle.
- Use a ruler and pizza cutter (or a sharp knife) to cut into 9 long pieces that are about 23cm and 3cm wide.
- Working on one piece of dough at a time. Twist and gently pull the dough until it stretches to about 46cm in length. You will have to hold the dough with one hand as you twist with the other, to keep the filling in place, Cut the stick in half, place onto the prepared baking trays. Scrape up any cheese that may have fallen out when they were twisted and sprinkle over the breadsticks on the tray.
- Cover with a clean tea towel and leave in a warm place for about 15 minutes or until it has risen a little (but not doubled in size).
- Place in the preheated oven and bake for 15 – 20 minutes until light and golden in colour.


Violet R says
These look wonderful! Can't wait to try making them. A favourite bakery of mine does these in a variety of flavours (pesto, olive/tapenade, cheese with rock salt) and it is my goal to learn to make them at home. Thank you so much!
Fiorella Butcher says
These were really good thank you
Harriet Britto says
I'm glad you enjoyed the recipe!
meda najar says
these look delicious but I'm confused about the temperature of the oven. at 200 degrees f, this barely melted the cheese and left the dough still raw. I'm increasing to 350 to see if i can salvage this recipe.
Harriet Britto says
Thank you for the feedback. I’m sorry to hear that the recipe did not work out for you. In the recipe the oven temperature is 200 degrees Celsius and not Fahrenheit. I have updated the recipe to include 390 degrees Fahrenheit.